


Over the
years, and even more recently Android users have been the subjects of various
mockery from iPhone users, especially when it concerned photography. iPhone
users claim to have superior cameras, and android users who can’t afford the
flagship devices are left speechless. But what if picture quality on Android
was not due to the smartphone’s camera but the user?

Indeed the
presence of different versions of Android on millions of smartphone models from
various brands has led to fragmentation. Because of this, the experience on
android is greatly dependent on the model and brand bough, unlike on iPhones.
Eventually, this also affects photography on Android, as the various models have
various different cameras, leading to an inconsistency in picture qualities.
But even on medium or low range devices, decent pictures can be taken. It is
not always about the camera quality but also the skills of the user. With you,
I am going to share how, without even possessing a high-end android device, I
am able to take pretty decent shots.
Elements of photography to take into account
Let us take
a look at some terms that will be used throughout the guide or that can be
helpful to know:

Camera Resolution: This refers to the number of pixels contained
in the sensor of a camera. If a camera is said to have a resolution of 5MP
(five megapixels), then the sensor has five million pixels. The more pixels the
better, but not always. An 8MP camera may perform better than a 16MP camera.
Other elements affect the performance of a camera such as an aperture,
the processor, as well as special treatments, are given to the lenses.
Aperture: It is simply how big the hole in the shutter
is that lets light through the lens onto the sensor. The more light can reach
the sensor, the better. It is denoted by f/number, which represents the ratio
of focal length to aperture. It usually has a range of 2.4 to 1.6 on
smartphones. The lower the ratio the better.
Autofocus: A feature of cameras that allow a correct
focus to be made on the subject automatically making the picture clearer. Three
main types exist contrast, phase detection, and laser autofocus.

ISO: A measure of light sensitivity. A lower ISO
setting is better during the day, while higher is better in darker situations.
Going too high leads to visible noise or grain in your photos (it is a very
sensitive setting that mustn’t be touched if not well understood).
Exposure: This refers to the amount of light reaching
the sensor as determined by shutter speed, aperture, and ambient light. Usually,
poor camera tends to overexposed images – bright parts are close to white and
the overall colors appear to be washed out.
HDR: Stands for “Highly Dynamic Range”. It
combines multiple exposures to form a better image. You get more details in the
shadows and in the bright parts of the scene. Fail to turn on HDR and your
phone camera might blow out the bright sky or blackout any details in the shadows.
Also, be careful to stay still when shooting in HDR. Shooting in HDR is very
slow on average cameras and required some time. The slightest error will ruin
the picture.
So how do
you actually take these pictures? Follow these simple steps:
Identify the subject:
This is
obviously, the very first thing that needs to be done before taking a picture,
and without which no picture will, in fact, be taken. It is very important in
photography to scan your surroundings in search of that gem which your picture
will be. It will be easier for you to focus your attention on taking the
picture right. Locate your target, and be ready to unsheathe your phone and
snap that picture faster than your shadow (I don’t even know that makes sense
but never mind).

Just to say
that in photography, consistency is the key. You need to take as much picture
as you can, so observing your environment is key, and do not forget: YOUR FACE
IS NOT THE ONLY BEAUTIFUL THING AROUND YOU PERIOD.
Patience is
the key:
This is no
secret, anyone who is interested in photography will certainly know patience is
a very important factor. Whether you wait for those perfect first morning rays,
or for the next firework to be fired or for the next lightning to strike, you
will need to patiently observe.

However
what I want to emphasize here is to learn how to use your camera app. Today our
camera apps let us do much more than just hit the shutter button. Options like
HDR, aspect ratio (picture size), night mode, etc. and settings to control the
ISO, focus or shutter speed and aperture are now available to improve our
photographs. So take the time to see what your camera app has to offer and take
advantage of these options/settings. Or you can download the very popular Open
Camera app which single-handedly is the most complete camera app on the market
right now.
Tap to focus:
This may
sound absurd to some, but I am pretty sure there are a lot of people out there
who do not know about this. You just need to pay attention to how blurry some
pictures were taken on low to mid-range Android devices (LMAD we will call them) are
to know it surely hasn’t be focused beforehand. Don’t be hasty to click on that
shutter button guys. Most users relay this task to the autofocus, but not all
autofocus are efficient and some may fail you. There exist three types: laser,
phase detection, and contrast autofocus, with contrast being the slowest (and
what equipped most of the LMAD).
I will save
you the burden on explaining each technology (this article did a great job
explaining all of them). What you need to know is that contrast autofocus is
the slowest of all three, and mostly relies on the amount of light present, as
well as the speed of the processor. The back and forth movement the camera makes
when you open it indicates your camera uses contrast autofocus. Phase
detection and laser are the fastest and what equip most of the flagships.
iPhones use a special combination of phase detection and contrast autofocus in
a technology they call “Focus Pixel”. This leads to very fast, and precise
autofocus.
Back to business,
if your camera is equipped with a contrast autofocus (CA) chances are you will
probably have to tap to get that focus. Indeed CA is much slower to find the
focus. Also, note that the distance between the camera sensor and objects is
crucial and must be adjusted appropriately every time to get a focused image.
Another thing to note is never to tap on the brighter part of the image as that
will overexpose your picture. Always tap on the less illuminated part to get
that ideal exposure. Just try and play around by tapping anywhere on the image
to see what exposure is ideal for you, but always aim to first tap the subject-object of your picture.
Some
additional tips to help you ace your photographs:
- Take
the time to set the picture aspect ratio depending on your needs. For Instagram,
it is 4:3 (thank me later). Doing this will prevent your picture from being
cropped, thus exposing those gross pixels. - Turn
on the grid for better symmetric pictures - Take
tons of photo - Use
burst mode for moving subjects. - Aim
at using the HDR feature when taking images of landscapes and cities. - Use
the auto-correct feature of google photos (highly recommend this app for it
instant backup) - Abandon
the automatic mode and go for the manual mode to seriously improve your skills - Don’t
hesitate to use the flash in very low lit environment. Yes I know some pictures
are at times better without the flash as it tends to wash out the colors. But
always try to take a picture with and without the flash, then compare which one
is worth publishing online.
As you can
see, nothing fancy just my honest thoughts which I hope will help you upgrade
your photography skills. Don’t forget: observe, be patient and tap to focus. At
least by doing this will keep some iPhones users off your back and some may
even be jealous (it worked for me) hehe~.
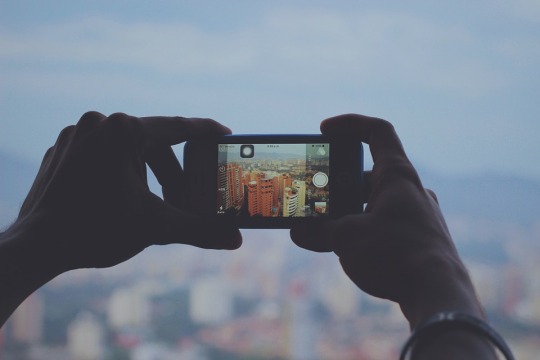
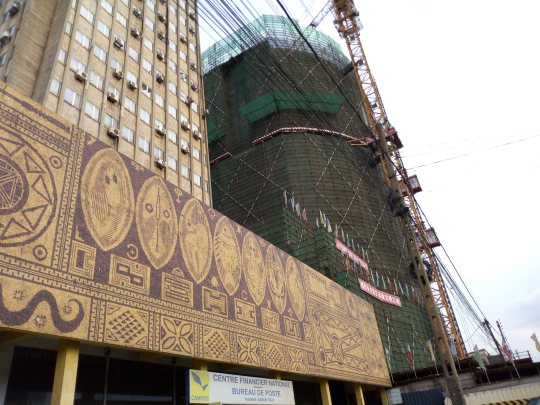
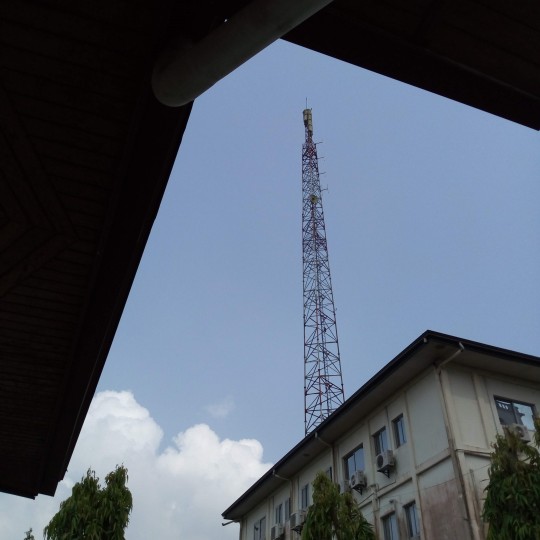
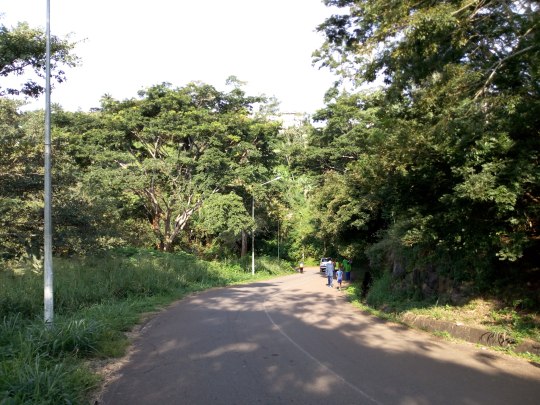
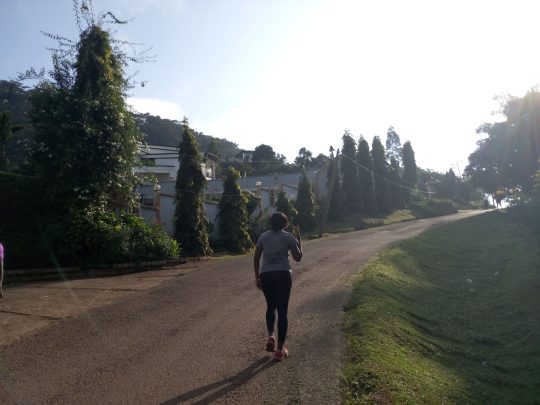
PS: all the pictures where taken on the Tecno Spark 2 just for you to see. It may not be perfect, but with some disciplines, you can get correct pictures.


No comments:
Post a Comment